22 Mar JavaScript SEO: Best Practices and Debugging Tools via @azarchick
JavaScript is a great option to make website pages more interactive and less boring.
But it’s also a good way to kill a website’s SEO if implemented incorrectly.
Here’s a simple truth: Even the best things in the world need a way to be found.
No matter how great your website is, if Google can’t index it due to JavaScript issues, you’re missing out on traffic opportunities.
In this post, you’ll learn everything you need to know about JavaScript SEO best practices as well as the tools you can use to debug JavaScript issues.
Why JavaScript Is Dangerous for SEO: Real-World Examples
“Since redesigning our website in React, our traffic has dropped drastically. What happened?”
This is just one of the many questions I’ve heard or seen on forums.
You can replace React with any other JS framework; it doesn’t matter. Any of them can hurt a website if implemented without consideration for the SEO implications.
Here are some examples of what can potentially go wrong with JavaScript.
Example 1: Website Navigation Is Not Crawlable
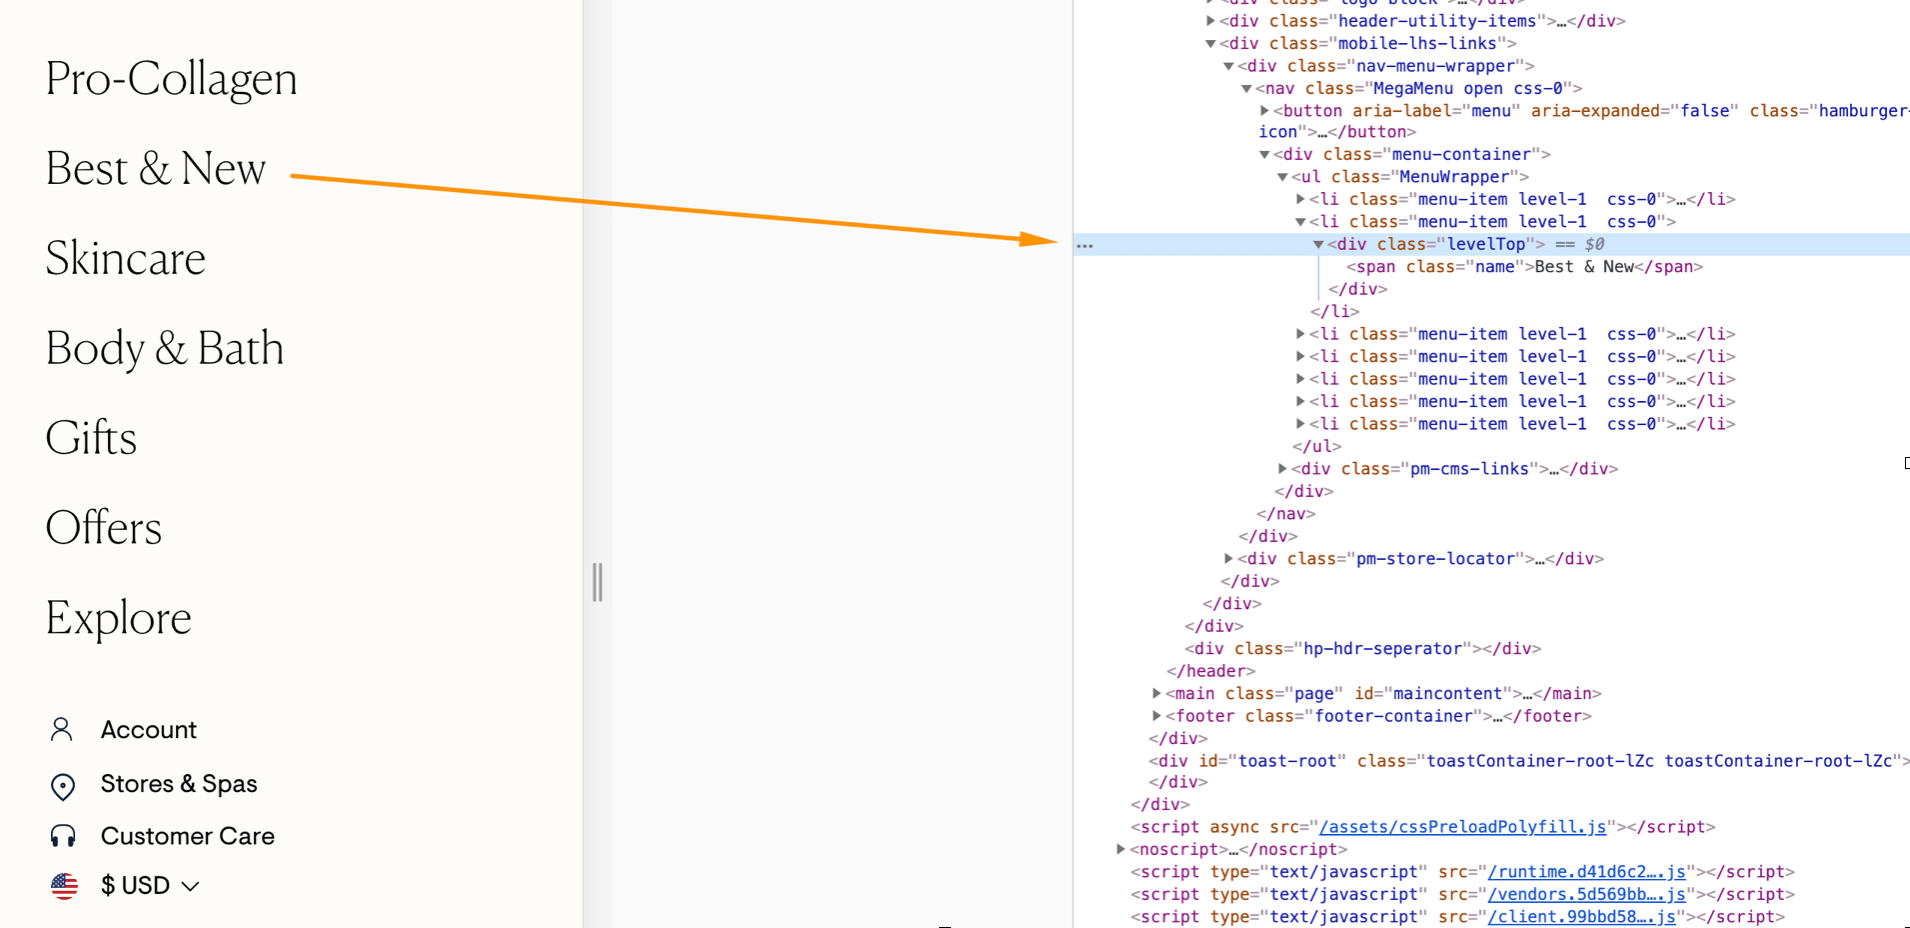

What’s wrong here:
The links in the navigation are not in accordance with web standards. As a result, Google can’t see or follow them.
Why it’s wrong:
- It makes it harder for Google to discover the internal pages.
- The authority within the website is not properly distributed.
- There’s no clear indication of relationships between the pages within the website.
As a result, a website with links that Googlebot can’t follow will not be able to utilize the power of internal linking.
Example 2: Image Search Has Decreased After Improper Lazy Load Implementation
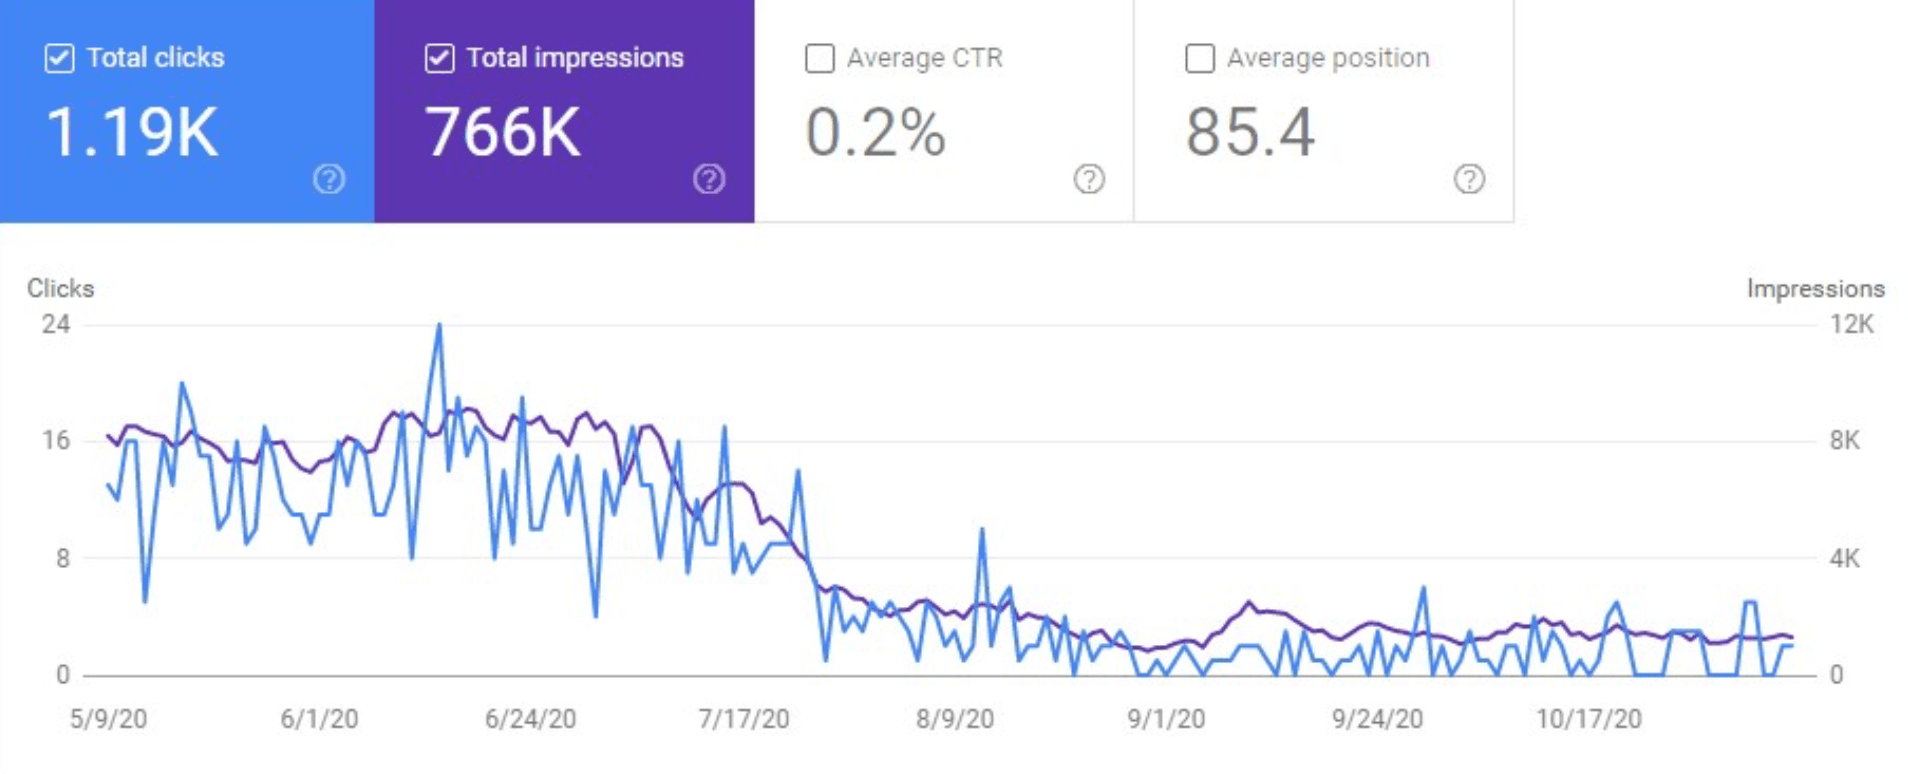

What’s wrong here:
While lazy loading is a great way to decrease page load time, it can also be dangerous if implemented incorrectly.
In this example, lazy loading prevented Google from seeing the images on the page.
Why it’s wrong:
- The content “hidden” under lazy loading might not be discovered by Google (when implemented incorrectly).
- If the content is not discovered by Google, the content is not ranked.
As a result, image search traffic can suffer a lot. It’s especially critical for any business that heavily relies on visual search.
Example 3: The Website Was Switched to React With No Consideration of SEO
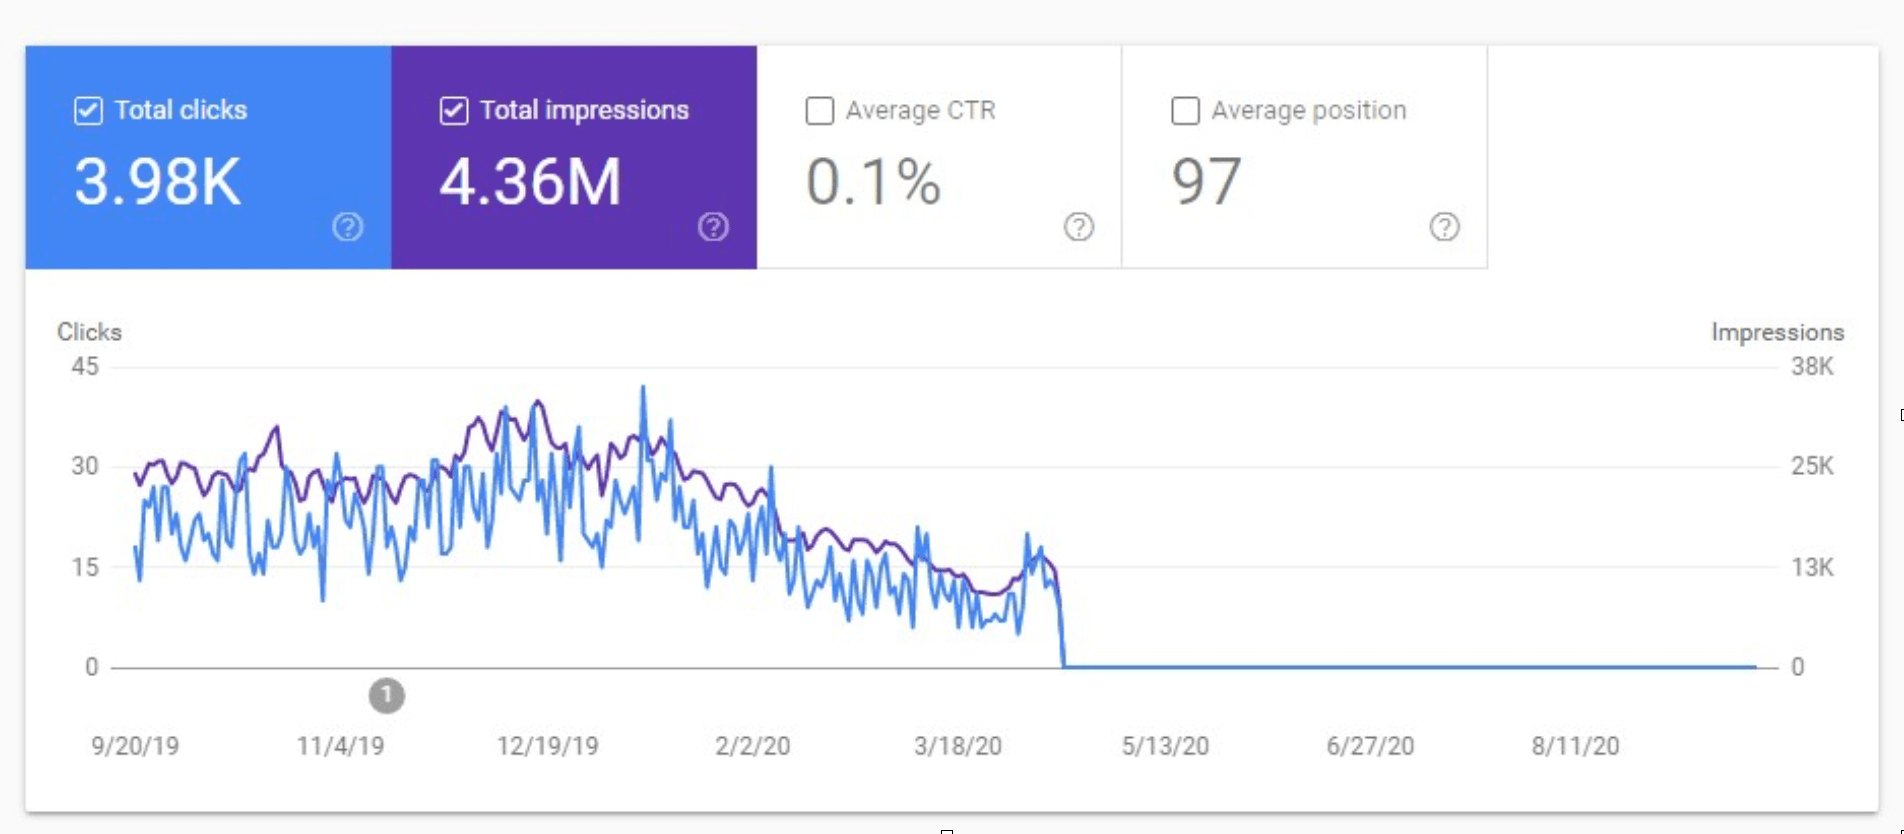

What’s wrong here:
This is my favorite example from a website I audited a while ago. The owner came to me after all traffic just tanked. It’s like they unintentionally tried to kill their website:
- The URLs were not crawlable.
- The images were not crawlable.
- The title tags were the same across all website pages.
- There was no text content on the internal pages.
Why it’s wrong:
- If Google doesn’t see any content on the page, it won’t rank this page.
- If multiple pages look the same to Googlebot, it can choose just one of them and canonicalize the rest to it.
In this example, the website pages looked exactly the same to Google, so it deduplicated them and used the homepage as a canonical version.
A Few Things You Need to Know About Google–JavaScript Relationships
When it comes to how Google treats your content, there are a few main things you should know.
Google Doesn’t Interact With Your Content
Googlebot can’t click the buttons on your pages, expand/collapse the content, etc.
Googlebot can see only the content available in rendered HTML without any additional interaction.
For example, if you have an expandable text section, and its text is available in the source code or rendered HTML, Google will index it.
On the contrary, if you have a section where the content is not initially available in the page source code or DOM and loads only after a user interacts with it (e.g. clicks a button), Google won’t see this content.
Google Doesn’t Scroll
Googlebot does not behave like a usual user on a website; it doesn’t scroll through the pages. So if your content is “hidden” behind an endless amount of scrolls, Google won’t see it.
See: Google’s Martin Splitt on Indexing Pages with Infinite Scroll.
Google doesn’t see the content which is rendered only in a browser vs on a server.
That’s why client-side rendering is a bad idea if you want Google to index and rank your website (and you do want it if you need traffic and sales).
Ok, so is JavaScript really that bad?
Not if JavaScript is implemented on a website using best practices.
And that’s exactly what I’m going to cover below.
JavaScript SEO Best Practices
Add Links According to the Web Standards
While “web standards” can sound intimidating, in reality, it just means you should link to internal pages using the HREF attribute:
<a href=”your-link-goes-here”>Your relevant anchor text</a>
This way, Google can easily find the links and follow them (unless you add a nofollow attribute to them, but that’s a different story).
Don’t use the following techniques to add internal links on your website:
- window.location.href=‘/page-url‘
- <a onclick=“goto(‘https://store.com/page-url’)”>
- #page-url
By the way, the last option can still be successfully used on a page if you want to bring people to a specific part of this page.
But Google will not index all individual variations of your URL with “#” added to it.
See: Google SEO 101: Do’s and Don’ts of Links & JavaScript.
Add Images According to the Web Standards
As with internal links, image usage should also follow web standards so that Googlebot can easily discover and index images.
To be discovered, an image should be linked from the ‘src’ HTML tag:
<img src=”image-link-here.png” />
Many JavaScript-based lazy loading libraries use a ‘data-src’ attribute to store the real image URL, and they replace the ‘src’ tag with a placeholder image or gif that loads fast.
For example:
<img data-src="image-link-here.png" src="placeholder-imge.gif"></div>
<img data-src> stores additional info about the image.
It helps with page speed optimization and works well if implemented correctly.
If you want Google to pick up your real image instead of the placeholder, swap the placeholder image to the target image so that <img src> shows the path to the target image.
During the recent Google Search Central Live event, I did a live case study of how to debug issues with images lazy-loaded using a JavaScript Library.
Alternatively, you can eliminate JavaScript by using native lazy loading. which is now supported by many browsers.
Use Server-Side Rendering
If you want Google to read and rank your content, you should make sure this content is available on the server, not just in a user’s browser.
Alternatively, you can use dynamic rendering which implies detecting search engines and serving them static HTML pages while users are served HTML + JavaScript content in their browsers.
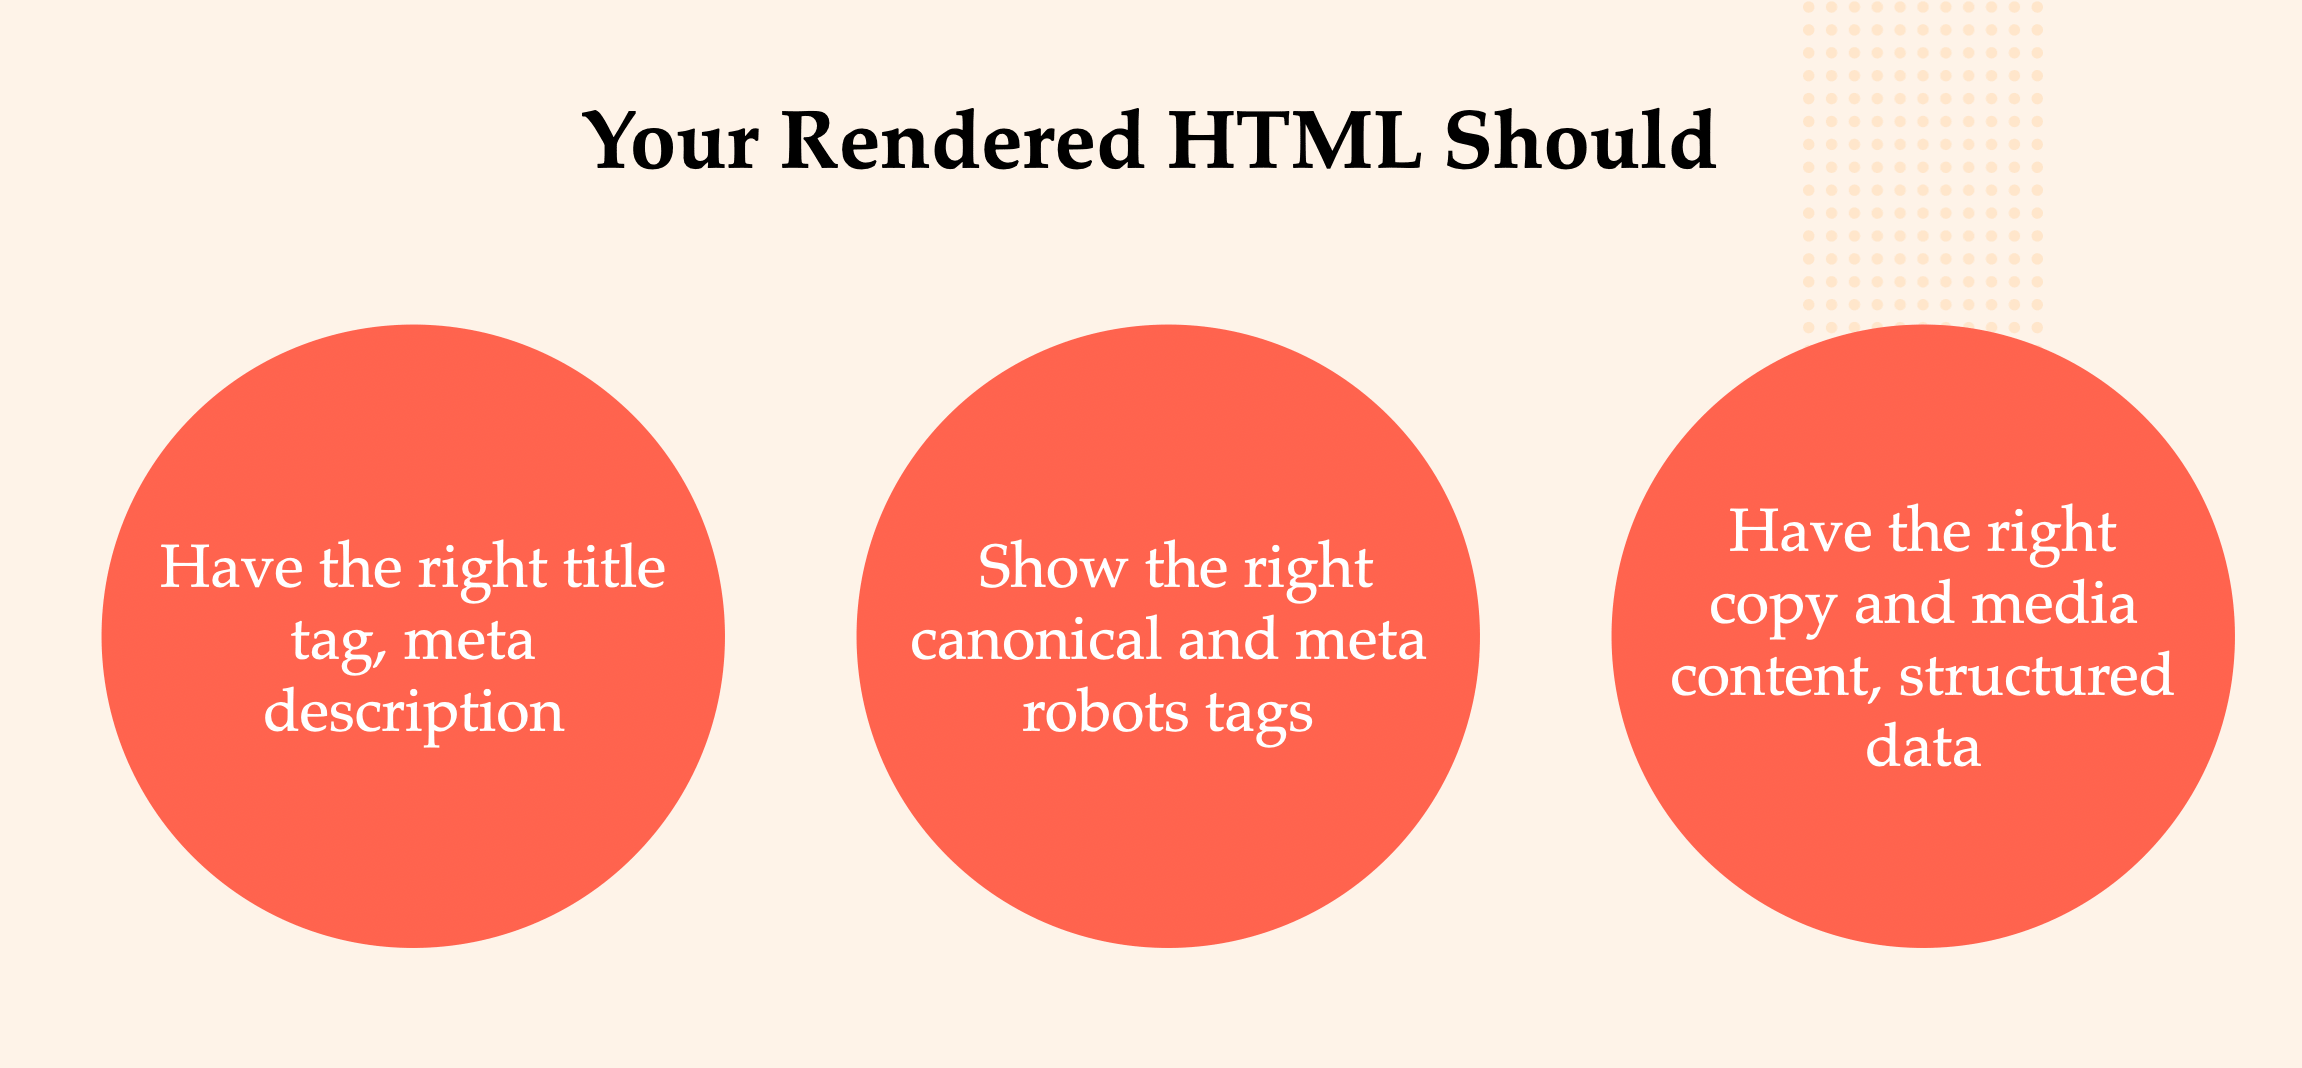
Make Sure That Rendered HTML Has All the Main Information You Want Google to Read
You need to make sure that rendered HTML shows the right information such as:
- Copy on the page.
- Images.
- Canonical tag.
- Title & meta description.
- Meta robots tag.
- Structured data.
- hreflang.
- Any other important tags.

Tools for Debugging JavaScript Implementation for SEO
Gone are the days when you’d only needed to look at the source code of a page to check if it includes the right content.
JavaScript has made it more complicated, in that it can add, remove or change different elements. Looking at the source code is not enough; you need to check the rendered HTML instead.
Step 1: Check How Much a Website Relies on JavaScript to Serve the Content
The first thing that I usually do when I see a website that relies on JavaScript is to check how much it depends on it. The easiest way to do this is to disable JS in your browser.
I use the Web Developer Chrome extension for that.
Simply open settings, click Disable JavaScript and reload the page:


Once you do it, you’ll see how a page would look without any JS.
In the example above, you can see that no content is available without JavaScript.
Note that this method just gives you an overview of how much JavaScript influences content delivery. It does not tell you if Google will index it or not.
Even if you see a blank page like above, it doesn’t mean that nothing’s working. It just means that a website heavily relies on JavaScript.
That’s why you need to test the rendered HTML with the tools I’ll show you in the next step.
Step 2: Check if Googlebot Is Served the Right Content and Tags
Google Mobile-friendly Test Tool
Google’s Mobile-friendly Test Tool is one of the best and most reliable tools when it comes to checking mobile-rendered HTML because you get information right from Google.
What you need to do:
- Load the Mobile-friendly tool.
- Check your URL.
- Look at the info in the HTML tab:
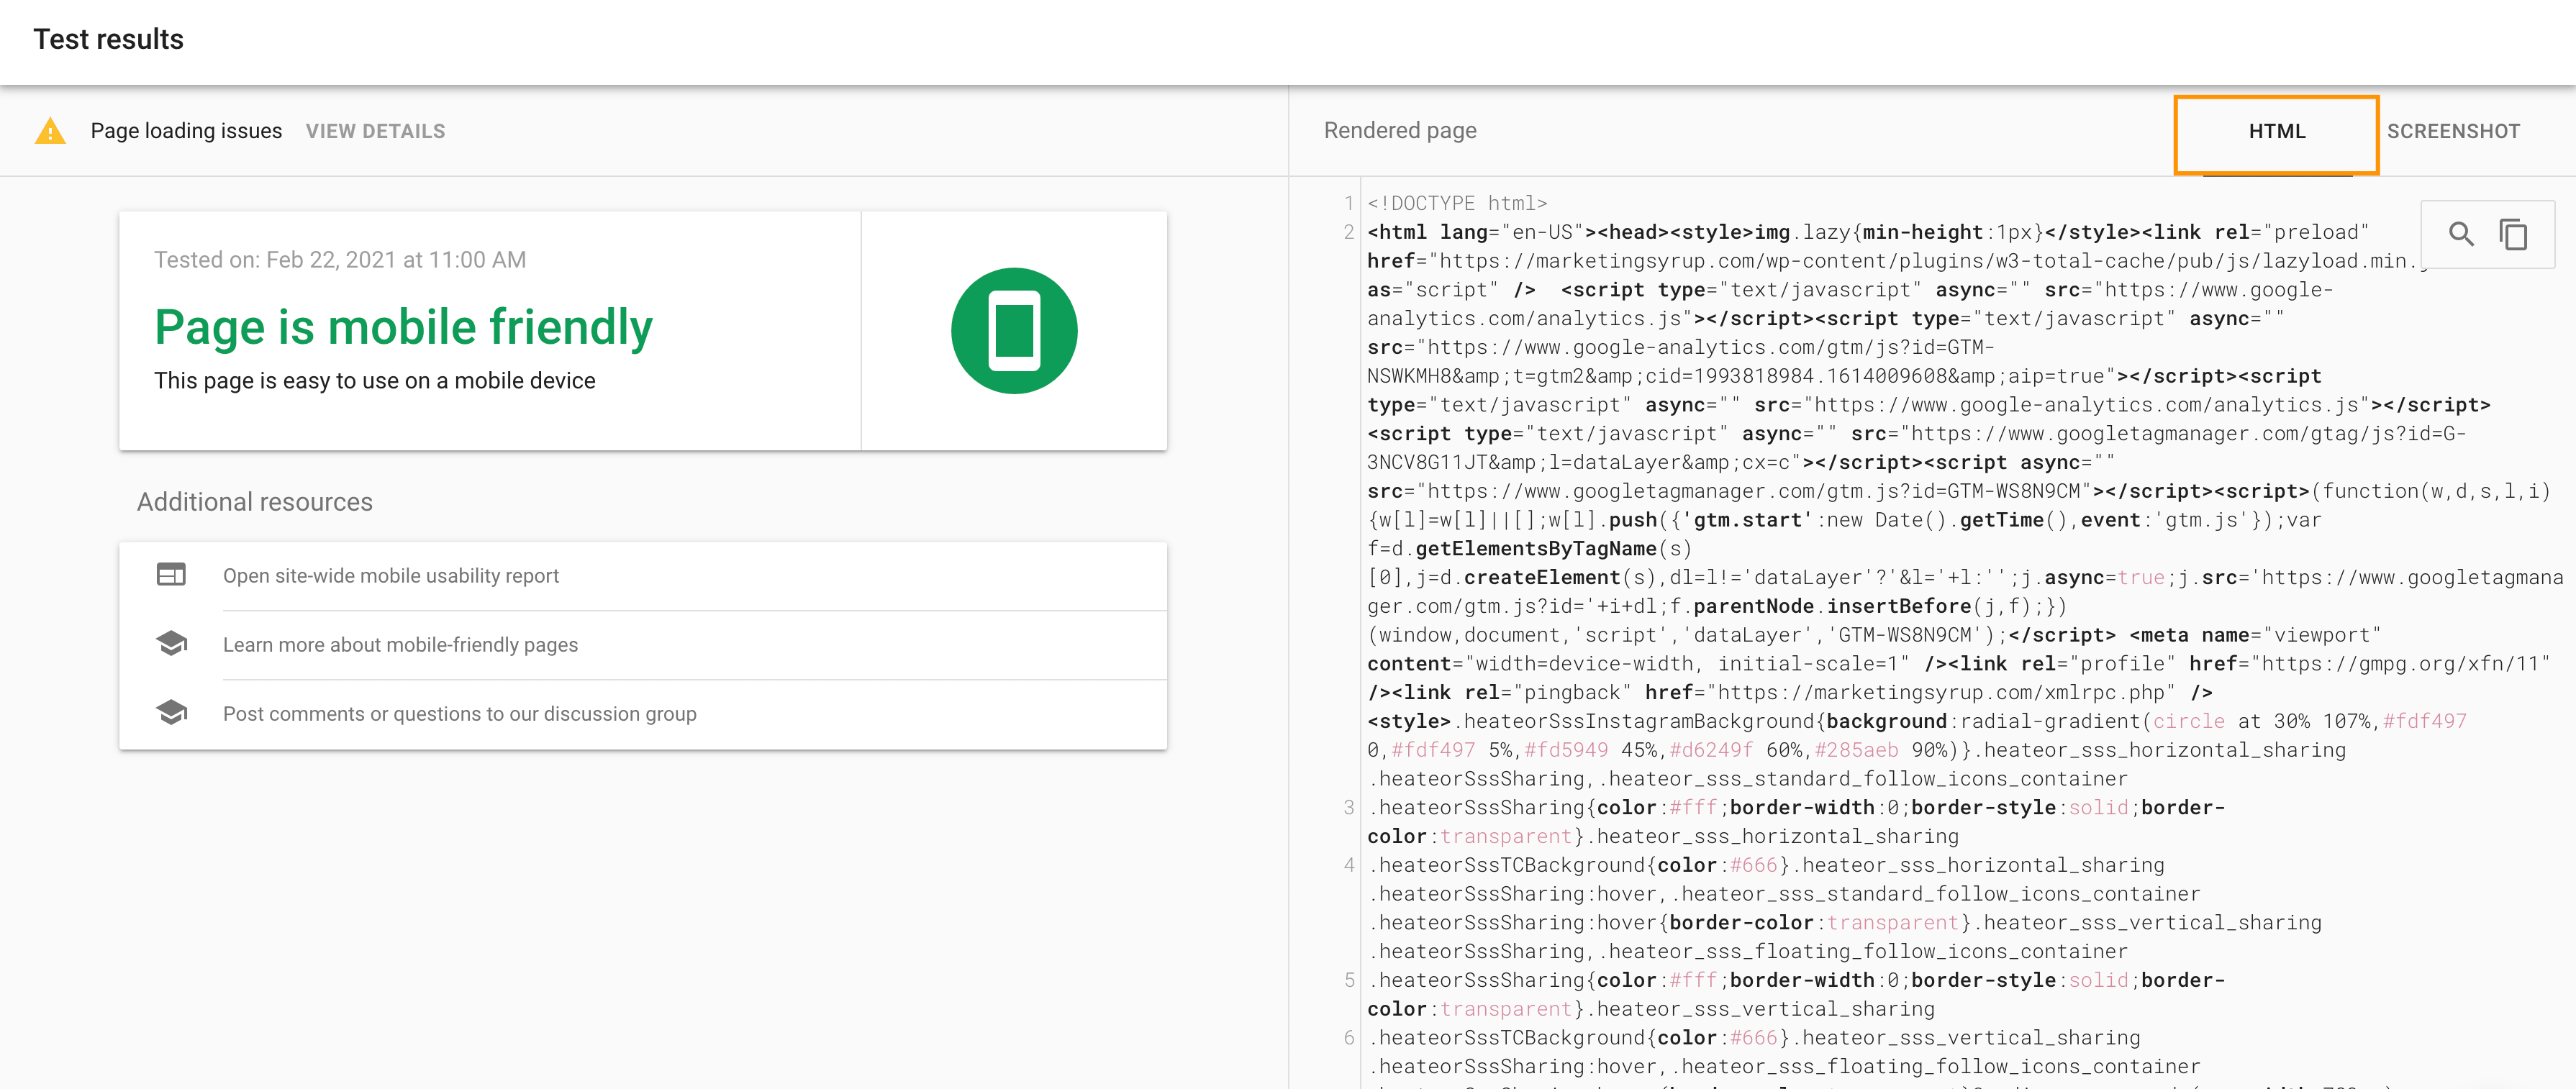

That’s where the technical SEO side comes in, as you’ll have to check the code to make sure it has the right information.
Note: you can use the Rich Results Test tool to do these checks, too:


URL Inspection Tool in Google Search Console
The URL Inspection tool also gives you access to the raw HTML of your page that Googlebot uses for evaluating your page content:


The Mobile-friendly Test Tool vs URL Inspection Tool
Ok, so what’s the difference between these tools and which is preferred?
The short answer is that there’s no difference in the output since the Mobile-Friendly Test and URL inspection tool use the same core technology.
There are some differences in other aspects, though:
- To use the URL Inspection Tool, you need to have access to the Google Search Console of the website you’re checking. If you don’t have such access, use the Mobile-Friendly Test (or Rich Results Test).
- The URL inspection tool can show you two versions of the same page — the last crawled version and the live version. It’s handy if something has just been broken by JavaScript and you can compare the new implementation to the previous one.
The Mobile-Friendly Test and Rich Results Test give you the output for your current live page version only.
Other Debugging Tools
View Rendered Source Chrome Extension
I love this extension as it shows the difference between the source code and rendered HTML. It gives you an overview of what JavaScript changes on the page:
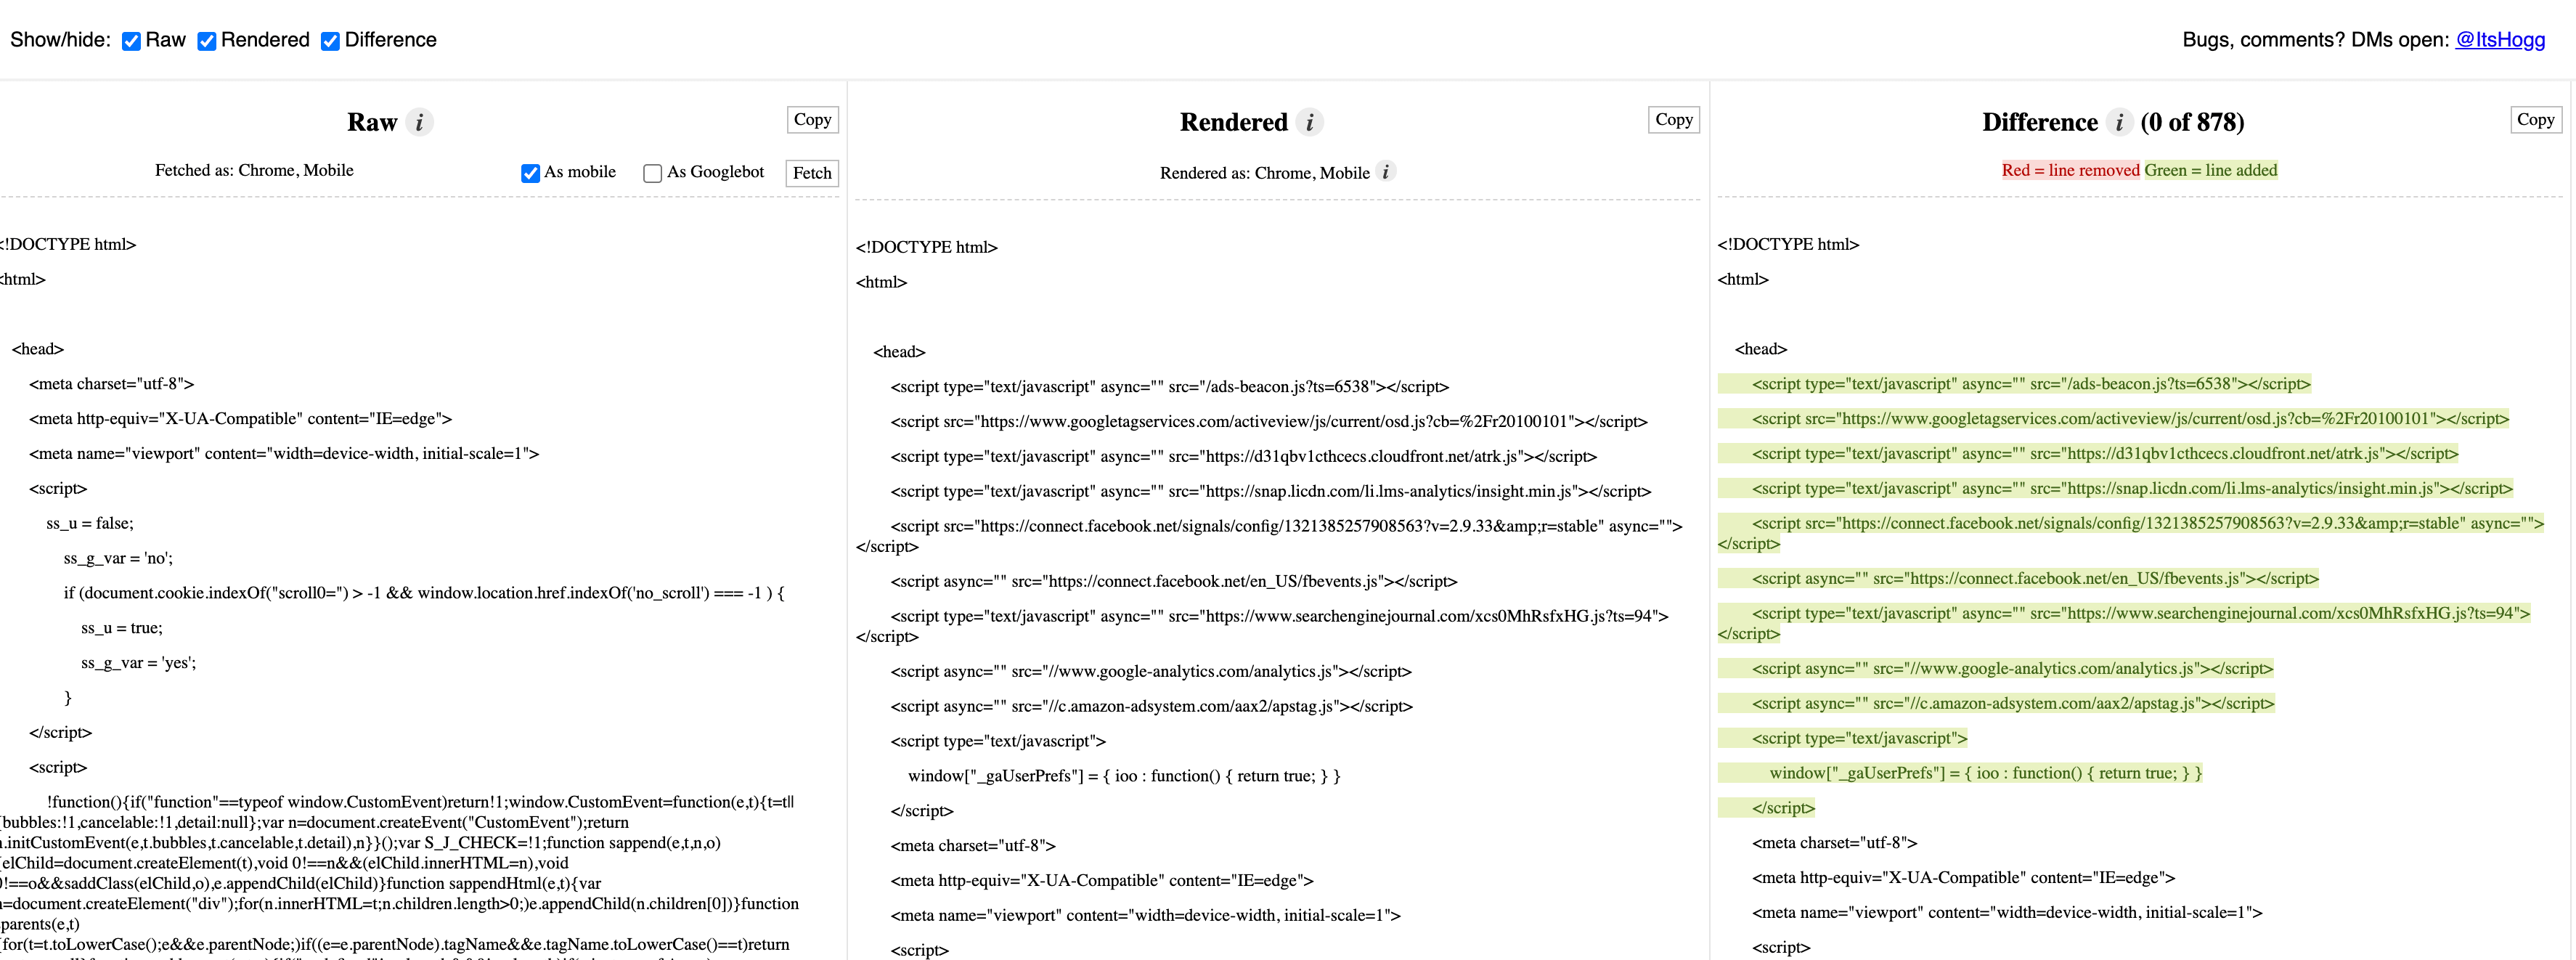

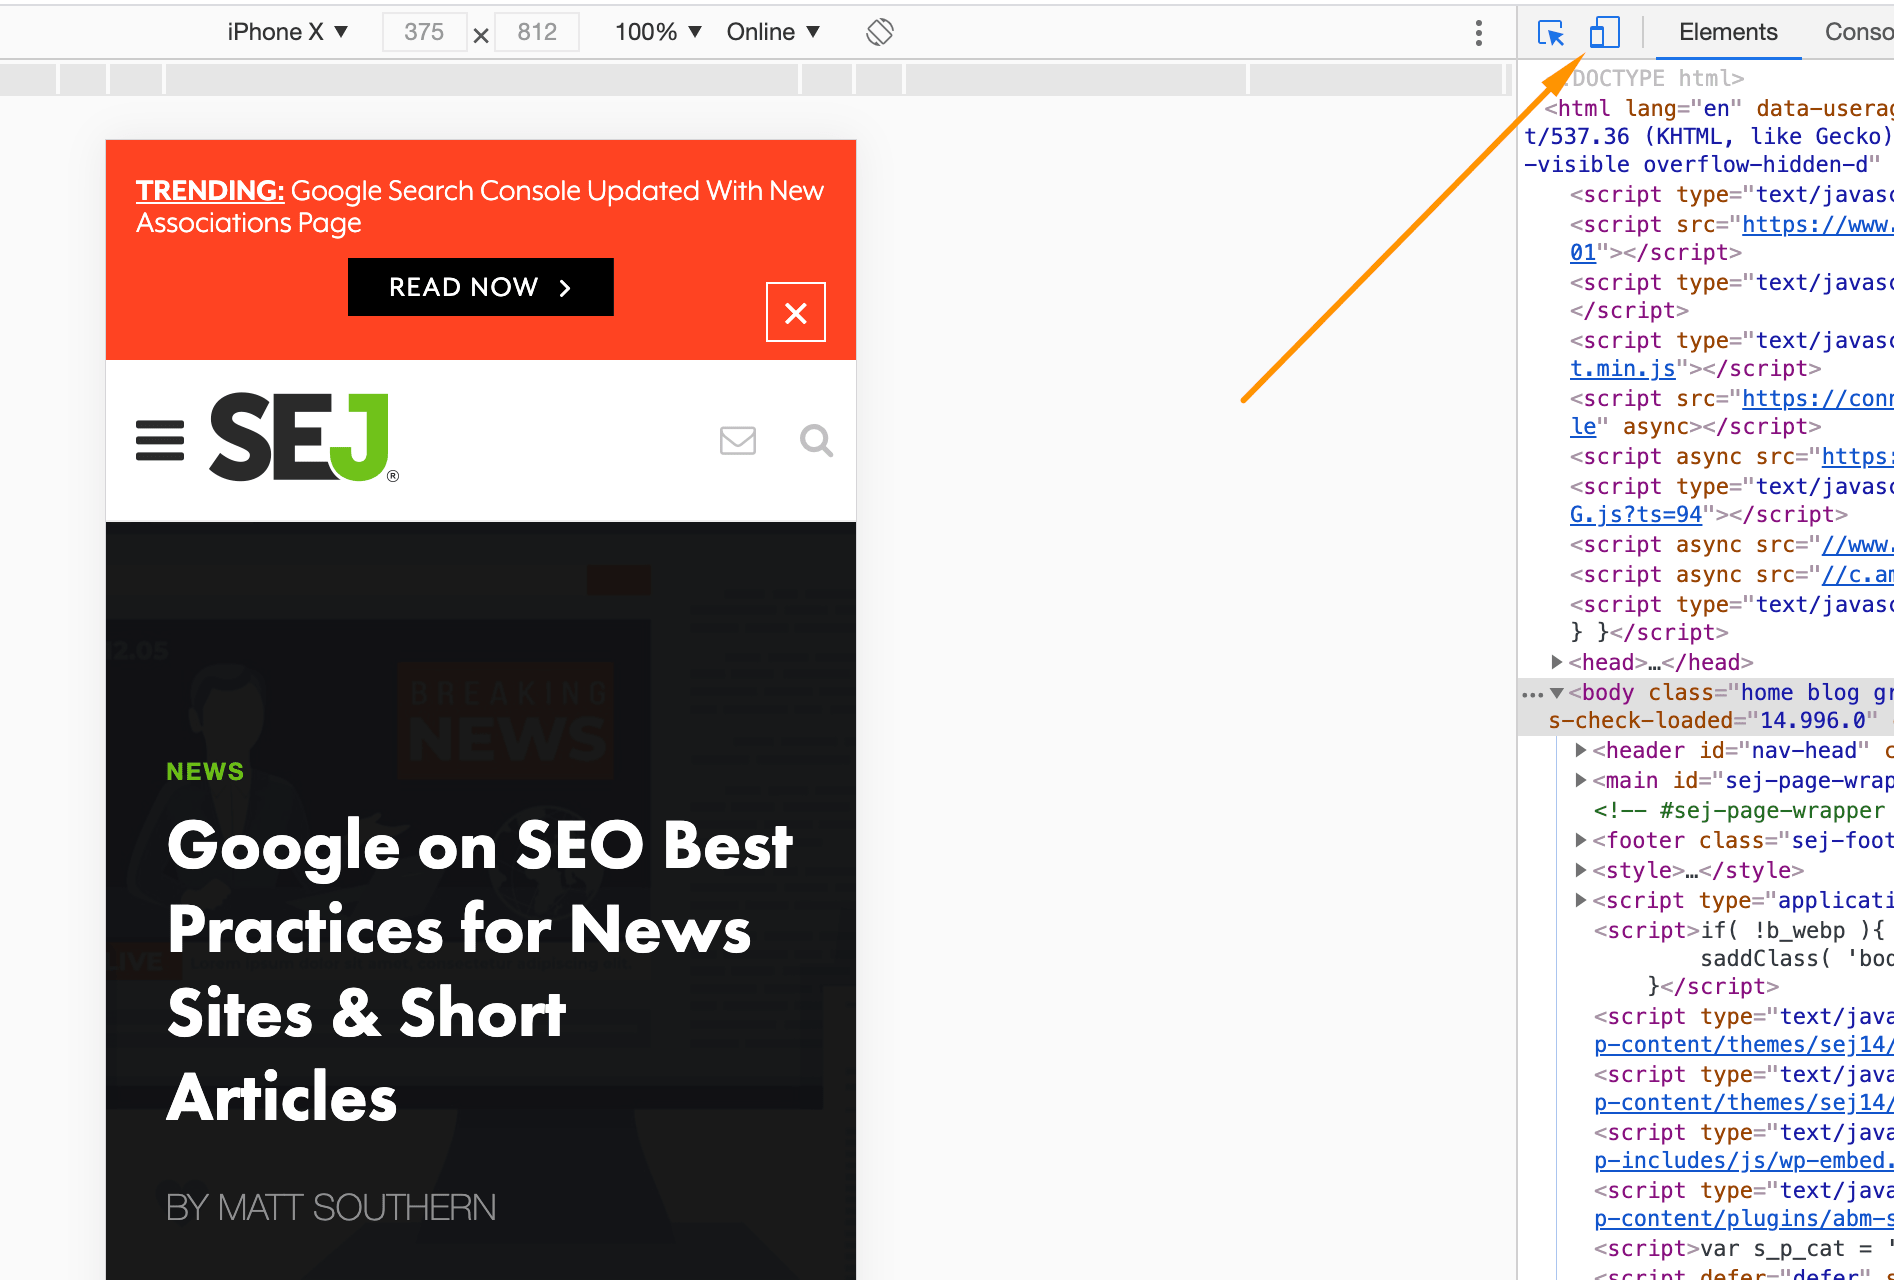
Note: Make sure you check mobile rendered HTML vs desktop.
To do this, you need to first load a mobile view in the Chrome inspection tool and then use the View Rendered Source extension:

JavaScript Rendering Check
I think this is the most user-friendly JS debugging tool as you don’t even need to check the code.
It checks the main elements in the page source code for you and compares them to the same elements in the rendered HTML (again, make sure to check the mobile version):
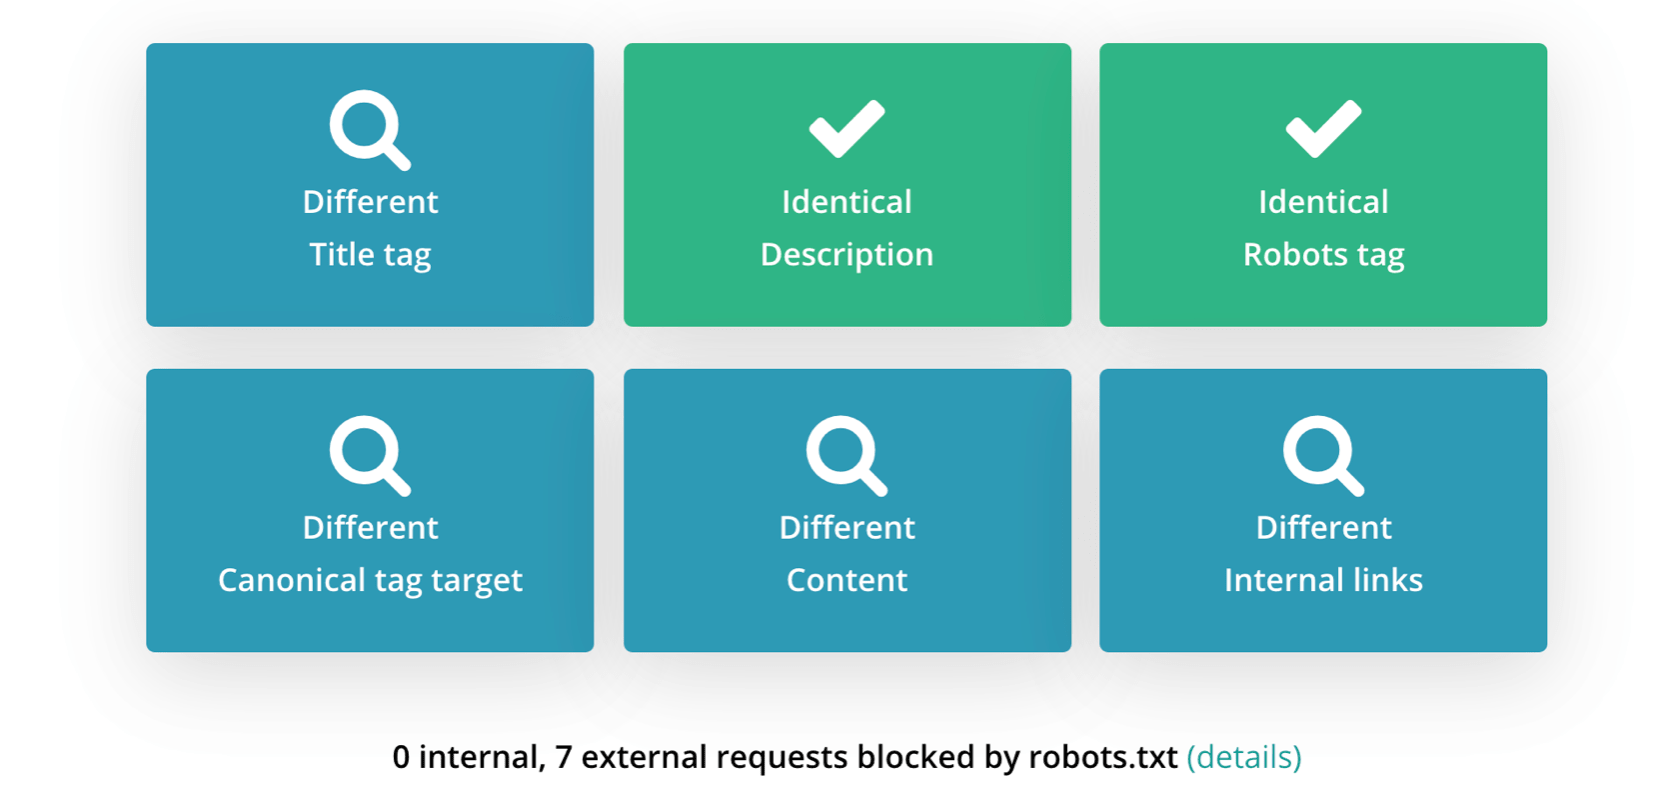

In this example, I see that JavaScript changes the main elements on the page such as the Title Tag, canonical, internal links.
It’s not always a bad thing but as an SEO professional, you’ll need to investigate whether these changes harm the page you’re checking or not.
You can also use the SEO Pro extension to see the Title tag and other important tags found in rendered HTML, not source code:
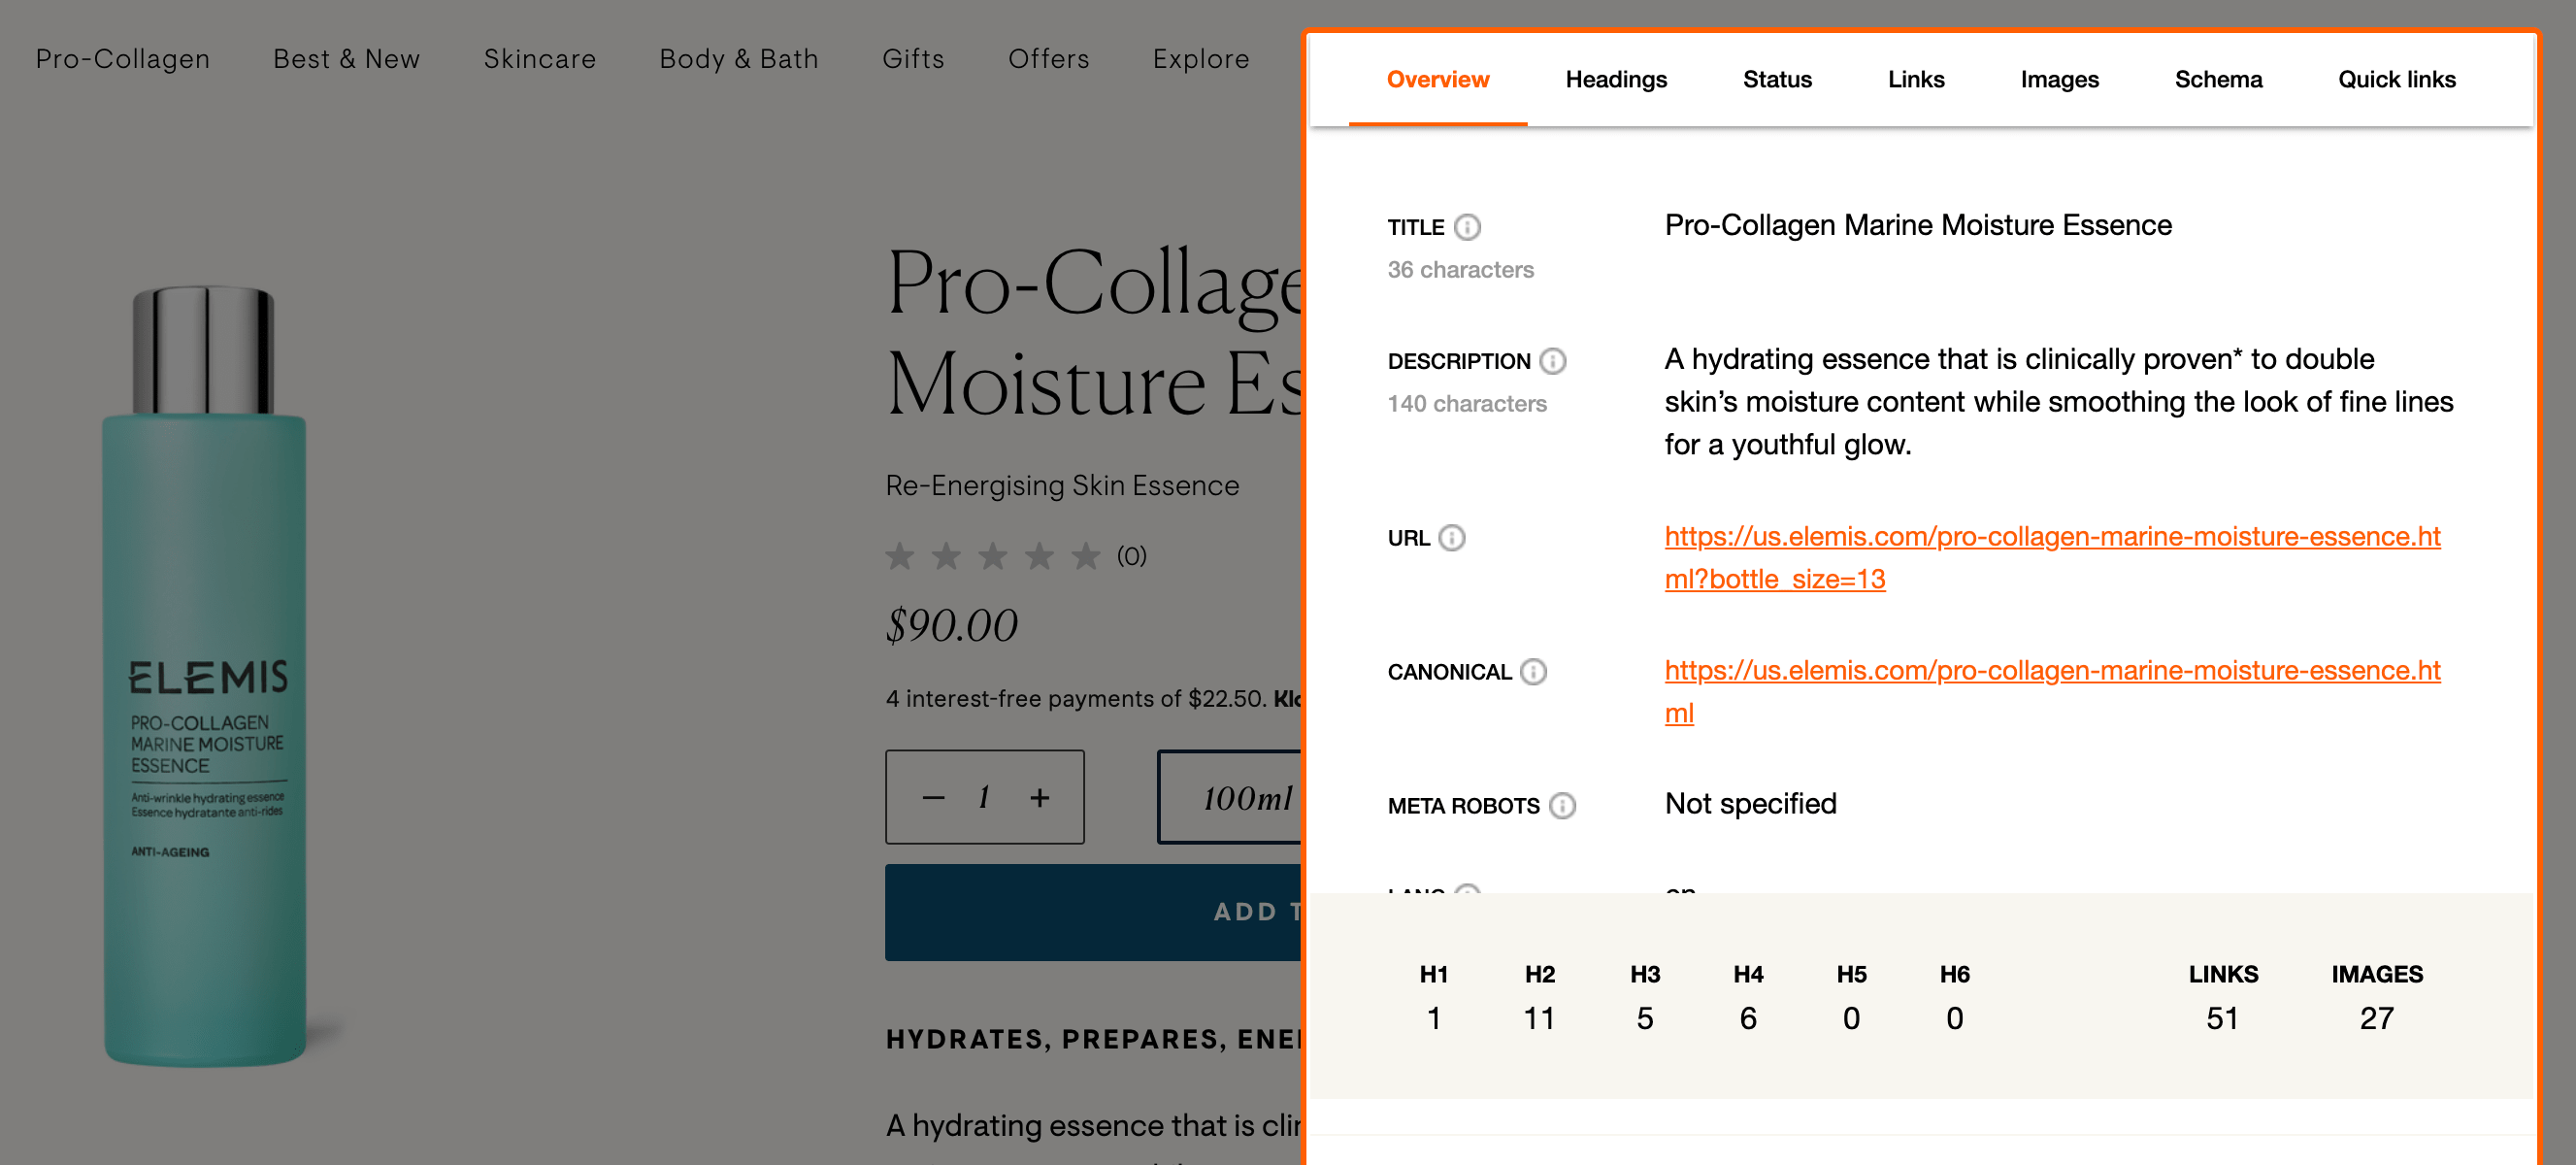

I prefer using a combination of the tools mentioned above to investigate JavaScript SEO issues or ensure that best practices are implemented.
More Resources:
- JavaScript Basics for SEO Professionals
- A Hands-On Introduction to Modern JavaScript for SEOs
- Google’s Martin Splitt Explains Why Infinite Scroll Causes SEO Problems
Image Credits
All screenshots taken by author, March 2021
Sorry, the comment form is closed at this time.